
| 일 | 월 | 화 | 수 | 목 | 금 | 토 |
|---|---|---|---|---|---|---|
| 1 | 2 | 3 | ||||
| 4 | 5 | 6 | 7 | 8 | 9 | 10 |
| 11 | 12 | 13 | 14 | 15 | 16 | 17 |
| 18 | 19 | 20 | 21 | 22 | 23 | 24 |
| 25 | 26 | 27 | 28 | 29 | 30 | 31 |
- 탬플릿문자열
- 혼공자스
- 숫자자료형
- 봄날스웨터
- 조건문
- 2023나만의버킷리스트만들기
- 자바
- 나머지 매개변수
- 아이디어 #앱아이디어 #건축 #현장관리어플
- 배열의 요소로 함수 할당
- 문자자료형
- Visual Studio Code Shortcut for windows
- 스코프 및 화살표 함수
- 혼자공부하는자바스크립트
- 폴로스타일니트
- 유령의마음으로
- 함수
- 배열
- 항해99사전강의
- 비쥬얼 스튜디오 코드 프로그램 단축키(윈도우)
- 스파르타코딩클럽
- 불자료형
- 항해99
- 객체
- 일급객체(함수)
- BomNalSweater
- 랑과나의사막
- 책리뷰
- 자바스크립트
- 자바뽀개기
- Today
- Total
하고 싶은게 많음
[혼공자스] 07.문서 객체 모델 본문

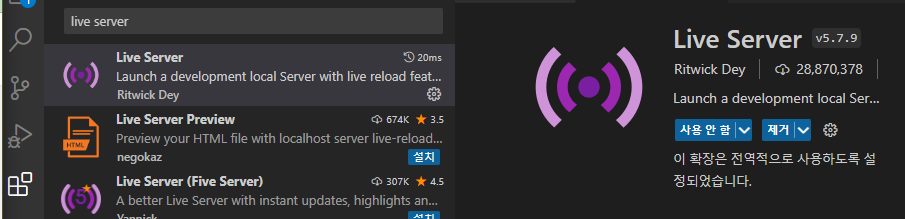
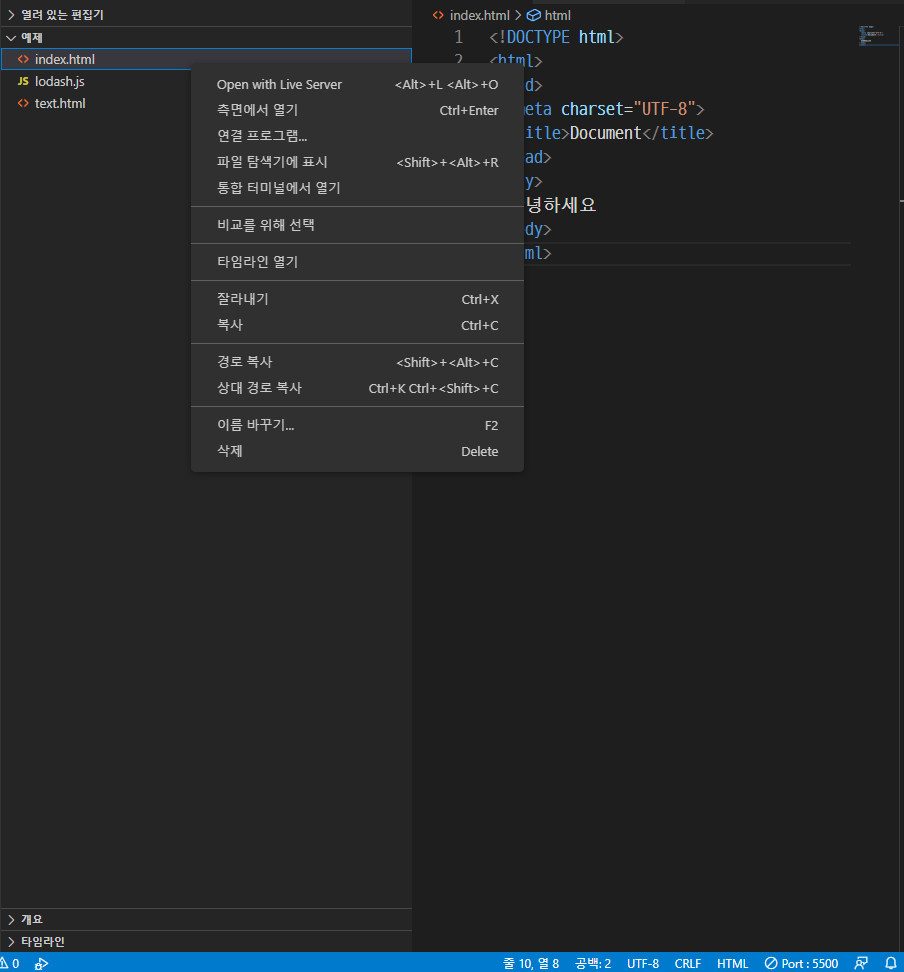
공부에 앞서 vscode에서 live server 확장팩을 설치해준다. 기존에는 코드를 저장 후 파일 이름을 끌고와서 웹브라우저에 놓아 실행을 확인했다면 live sever 확장팩을 설치하게되면 파일 저장만으로도 즉각적으로 웹브라우저에서 확인이 가능하다.
HTML 페이지에 있는 html, head, body, title, h1, div, span 등을 html 언어에서는 요소 element 라고 함.
자바스크립트에서는 문서 객체document object라고 함.
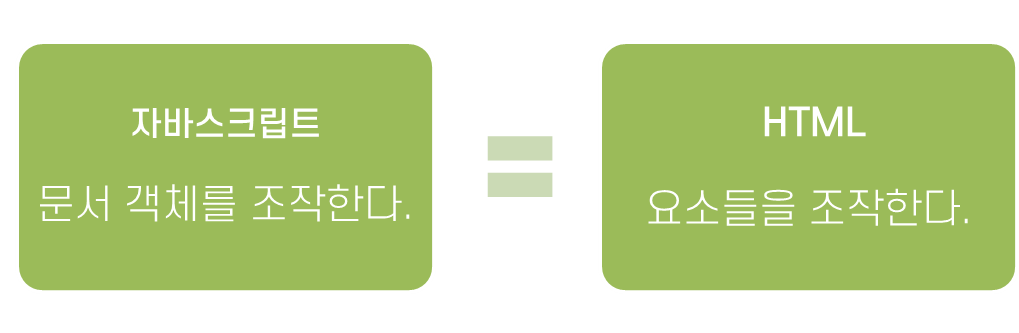
문서 객체 모델 DOM(Document Object Model)
"문서 객체를 조합해서 만든 전체적인 형태 "
문서 객체 : HTML 요소
문서 객체 모델: 그걸 조작하는 객체들의 집합
HTML 파일은 위에서 아래로 실행이 됨. 스크립트 태그를 어디다가 놓는지에 따라 태그의 실행 순서가 달라짐.
DOMContentLoaded 이벤트
문서 객체를 조작할 때 사용 (오타가 나도 오류를 발생하지 않으니 주의요망)
<!DOCTYPE html> //이라고 적혀있으므로 HTML5문서이겠군
<html> //html 태그가 있으니까 만들어야지
<head></head> //head 태그가 있으니까 만들어야지
  <title>Document</title> //title 태그가 있으니까 반영해야지
</head>
<body>//body 태그가 있으니까 만들어야지

</body>
</html>
HTML 코드를 자바스크립트로 조작하기
document.body.innerHTML += '<h1></h1>'
문서(document)의 바디(body)안에 있는 HTML 코드(innerHTML) 문자열을 출력하게 할 수 있는 코드
innerHTML의 속성이 문자열이라서 += '<h1></h1>'의 연산이 가능함
<!DOCTYPE html>
<html>
<head>
  <title>DOMContentLoaded</title>
  <script>
    //HTML 태그를 쉽게 만들 수 있는 콜백 함수를 선언.
    const h1 = (text) => `<h1>${text}</h1>`
  </script>
  <script>
    document.body.innerHTML += h1('1번째 script 태그')
  </script>
</head>
<body>
  <script>
    document.body.innerHTML += h1('2번째 script 태그')
  </script>
  <h1>1번째 h1 태그</h1>
  <script>
    document.body.innerHTML += h1('3번째 script 태크')
  </script>
  <h1>2번째 h2 태크</h1>
</body>
</html>
ㄴ (전제조건: HTML코드는 위에서 아래로 순서대로 실행됨) document.body.innerHTML는 body태그안에 문자열을 출력하는 기능을 함. 근데 head태그 안에 script태그 안에 있는 '1번째 script 태그'는 아직 body를 만나지 못했기 때문에 실행이 안됨. 허나 아래에 있는 '2번째, 3번째 script 태그' 문자열은 body태그 안에 있으며 ( 다른말로 body태그를 만났기에) 출력이 되는 것. 실행할 태그 아래에 innerHTML이 있어야 실행이 된다.
위의 내용에 이어서 근데 이제 HTML 코드를 앞으로 보게 되면 script태그를 최대한 head 태그 안에 넣어서 문서 객체 조작을 해달라는 요구를 만나게 된다. 그럴 때 사용하는 게 바로 document.addEventListener ('DOMContentLoaded', () => {}) 이다. 요구사항 대로 <head> - <script> 에 저 코드를 넣게 되면 "문서객체가 다 만들어진 다음 이 함수를 실행해달라" 라는 의미가 되어 head 태그 안에서 작성을 해도 된다.
DOMContentLoaded 이벤트
document.addEventListener ('DOMContentLoaded', () => {})
웹 브라우저가 문서 객체를 모두 읽고 나서 실행하는 이벤트
<!DOCTYPE html>
<html>
<head>
   <title>DOMContentLoaded</title>
   <script>
      //DOMContentLoaded 이벤트를 연결
      document.addEventListener('DOMContentLoaded', () => {
         const h1 = (text) => `<h1>${text}</h1>`
         document.body.innerHTML += h1('DOMContentLoaded 이벤트 발생')
      })
   </script>
</head>
<body>

</body>
</html>
ㄴ코드를 실행하면 script 태그가 body 태그가 이전에 위치해도 문제없이 코드가 실행됨.
문서객체 가져오기
document.____를 사용하면 html 내에 있는 특정 태그 안에 접근이 가능
document.body 코드를 사용하면 문서의 body 요소를 읽어들일 수 있음. 이외에도 HTML에있는 head 요소와 title요소 등은 다음과 같은 방법으로 읽어들일 수 있음.
document.head //head 태그에 접근 가능
document.body //body 태그에 접근 가능
document.title //title 태그에 접근 가능
태그 수정을 위해 태그를 읽어들여야함. 이럴 때 사용하는게 아래 메소드
document.querySelector(선택자)
document.querySelectorAll(선택자)
선택자 부분에는 CSS선택자를 입력. CSS선택자는 매우 다양함.
| 이름 | 선택자 형태 | 설명 |
| 태그 선택자 | 태그 | 특정 태그를 가진 요소를 추출 |
| 아이디 선택자 | #아이디 | 특정 id속성을 가진 요소를 추출 |
| 클래스 선택자 | .클래스 | 특정 class 속성을 가진 요소를 추출 |
| 속성 선택자 | [속성=값] | 특정 속성 값을 갖고 있는 요소를 추출 |
| 후손 선택자 | 선택자_A 선택자_B | 선택자_A 아래에 있는 선택자_B를 선택 |
<!DOCTYPE html>
<html>
<head>
  <meta charset="UTF-8">
  <title>Document</title>
  <script>
    document.addEventListener('DOMContentLoaded', () => {
      document.querySelector('h1').style.color = 'red' //태그 선택자
      document.querySelector('#header').style.backgroundColor = 'orange' //아이디 선택자
      document.querySelector('.center.head').style.textAlign = 'center' //클래스 선택자 (클래스가 두 개면 띄어쓰기 없이 .찍어서 사용)
      document.querySelector('[type=text]').style.borderRadius = '10px' //속성 선택자
      document.querySelector('body input').style.backgroundColor = 'blue' //후손 선택자
    })
  </script>
</head>
<body>
  <h1 id = "header" class="center head">안녕하세요!</h1>
  <input type="text">
  <input>
</body>
</html>

querySelector( ) 메소드, querySelectorAll( ) 메소드
querySelector( ) 메소드 "요소 하나만 추출"
<!DOCTYPE html>
<html>
   <head>
      <title></title>
      <script>
         document.addEventListener('DOMContentLoaded', () => { //진짜 오타 조심해야함
         //요소를 읽어들임.
            const header = document.querySelector('h1') //h1 태그 이름으로 요소를 선택

            //텍스트와 스타일을 변경
            header.textContent = 'HEADERS'
            header.style.color = 'white'
            header.style.backgroundColor = 'black'
            header.style.padding = '10px'
          })
      </script>
   </head>
   <body>
      <h1></h1>
   </body>
</html>
querySelectorAll( ) "문서 객체를 여러 개 추출"
querySelectAll( ) 함수는 문서 객체 여러 개를 배열로 읽어들이는 함수임. 따라서 내부의 요소에 접근활용하려면 반복을 돌려야하는데 일반적으로 for반복문 혹은 forEach( )메소드를 사용해서 반복을 돌림.
<!DOCTYPE html>
<html>
   <head>
      <title></title>
      <script>
         document.addEventListener('DOMContentLoaded', () => {
         //요소를 읽어들임.
            const headers = document.querySelectorAll('h1') //h1 태그 이름으로 요소를 선택

            //텍스트와 스타일을 변경
            headers.forEach((header) => {
               header.textContent = 'HEADERS'
               header.style.color = 'white'
               header.style.backgroundColor = 'black'
               header.style.padding = '10px'
               })
            })
      </script>
   </head>
   <body>
      <h1></h1>
      <h1></h1>
      <h1></h1>
      <h1></h1>
   </body>
</html>
글자 조작하기
글자를 조작할 때는 아래와 같은 메소드를 사용.
| 속성이름 | 설명 | 비고 |
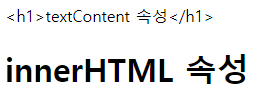
| 문서객체.textContent | 입력된 문자열을 그대로 넣음 | 많이 사용 |
| 문서객체.innerHTML | 입력된 문자열을 HTML 형식으로 넣음 | 보안문제로인하여 사용 별로안함 |
<!DOCTYPE html>
<html>
<head>
   <title></title>
   <script>
      document.addEventListener('DOMContentLoaded', () => {
         const a = document.querySelector('#a')
         const b = document.querySelector('#b')

         a.textContent = '<h1>textContent 속성</h1>'
         b.innerHTML = '<h1>innerHTML 속성</h1>'
      })
   </script>
</head>
<body>
   <div id = "a"></div>
   <div id = "b"></div>
</body>
</html>
<!DOCTYPE html>
<html>
<head>
    <meta charset="UTF-8">
    <title>Document</title>
    <script>
        document.addEventListener('DOMContentLoaded',() => {
            const header1 = document.querySelector('#textContent')
            const header2 = document.querySelector('#innderHTML')
            //값을 추출한다
            console.log(header1.textContent)
            console.log(header2.innderHTML)
            //값을 넣는다.
            header1.textContent = '원하는 문자열1'
            header2.innderHTML = '원하는 문자열2'
        })
    </script>
</head>
<body>
    <h1 id = "textContent">textContent 속성 기존 문자열</h1>
    <h1 id = "innderHTML">innderHTML 속성 기존 문자열</h1>
</body>
</html>
속성 조작하기
문서 객체의 속성을 조작할 때는 다음과 같은 메소드를 사용
| 메소드 이름 | 설명 |
| 문서객체.setAttribute(속성 이름, 값) | 특성 속성에 값을 지정 |
| 문서객체.getAttribute(속성 이름) | 특정 속성을 추출 |
http://placekitten.com/너비/높이
위와 같은 URI입력하면 적절한 크기(너비,높이)의 고양이 이미지를 얻을 수 있음

<!DOCTYPE html>
<html lang="en">
<head>
  <meta charset="UTF-8">
  <title>Document</title>
  <script>
    document.addEventListener('DOMContentLoaded', () => {
      //조작
      const img = document.querySelector('img')
      //값을 넣는 행위
      img.setAttribute('src', 'http://placekitten.com/200/200')
      //값을 추출하는 행위
      console.log(img.getAttribute('src'))
    })
  </script>
</head>
<body>
  <img src = "" alt="">
</body>
</html>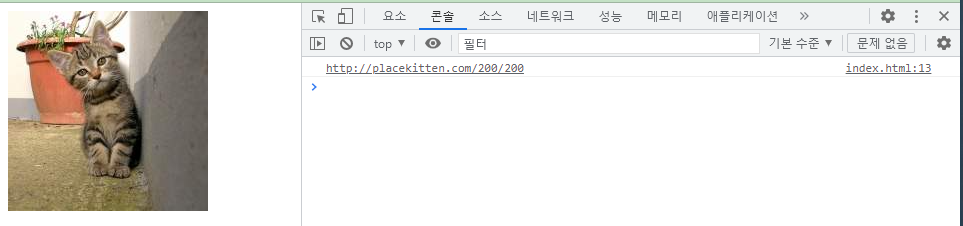
url처럼 표준에 있는 속성을 지정할 때는 setAttribute와 getAttribute 메소드를 사용하지 않고, 온점을 찍고 속성을 바로 읽어들이거나 지정 할 수 있음. 표준에 있는 속성이 아닌 사용자 정의 속성(=데이터 속성)을 사용할 때 (예를 들면 이미지 태그에 추가적인 정보를 추가하고 싶을 때)는 setAttribute, getAttribute 메소드를 사용해야한다.
<!DOCTYPE html>
<html lang="en">
<head>
  <meta charset="UTF-8">
  <title>Document</title>
  <script>
    document.addEventListener('DOMContentLoaded', () => {
      //조작
      const img = document.querySelector('img')
      //값을 넣는 행위
      img.src = 'http://placekitten.com/200/200'
      //값을 추출하는 행위
      console.log(img.src)
    })
  </script>
</head>
<body>
  <img src = "" alt="">
</body>
</html>
<!DOCTYPE html>
<html>
<head>
   <title></title>
   <script>
      document.addEventListener('DOMContentLoaded', () => {
      const rects = document.querySelectorAll('.rect')

      rects.forEach((rect, index) => {
         const width = (index + 1) * 100 //index 값은 [0,1,2,3]이라 1 더해서 [1,2,3,4] 만들고, 100을 곱해서 [100, 200, 300, 400] 만들어줌
         const src = `http://placekitten.com/${width}/250`
         rect.setAttribute('src', src) //setAttribute() 와 getAttribute()메소드말고 rect.src = src로 속성을 바로 읽어들이거나 지정할 수 있음
      })
      })
   </script>
</head>
<body>
   <img class = "rect">
   <img class = "rect">
   <img class = "rect">
   <img class = "rect">
</body>
</html>
스타일 조작하기
문서 객체의 스타일을 조작할 때 style 속성을 사용. style속성은 객체. 내부에는 속성으로 CSS를 사용해서 지정할 수 있는 스타일들이 있음.
이와 같은 3가지 방법으로 스타일을 조정 가능.
스타일 조정할 객체.style.backgroundColor // 이 형태를 가장 많이 사용함
스타일 조정할 객체.style['backgroundColor']
스타일 조정할 객체.style['background-color']
// 그레이디언트 만드는 코드
<!DOCTYPE html>
<html>
<head>
   <title></title>
   <script>
      document.addEventListener('DOMContentLoaded', () => {
         const divs = document.querySelectorAll('body > div') // body태그 아래에 있는 div 태그를 선택

         divs.forEach((div, index) => { //div개수만큼 반복 출력
            console.log(div, index)
            const val = index * 10  //인덱스는 0부터 24까지 반복
            div.style.height = `10px`  //크기를 지정할 땐 반드시 단위 기재 필수
            div.style.backgroundColor = `rgba(${val}, ${val}, ${val})`
         })
      })
   </script>
</head>
<body>
   <!--div 태크 25개-->
   <div></div><div></div><div></div><div></div><div></div><div></div><div></div><div></div><div></div><div></div><div></div><div></div><div></div><div></div><div></div><div></div><div></div><div></div><div></div><div></div><div></div><div></div><div></div><div></div><div></div>
</body>
</html>
문서 객체 생성하기
document.createElement( ) 메소드 " 문서 객체를 생성하고 싶을 때 메소드 활용 "
document.createElement (문서 객체 이름(태그이름))
document.addEventListener('DOMContentLoaded', () => {
        const header = document.createElement('h1') // header 태그를 만들고 //요소를 만들고
        header.textContent = 'createElement로 만든 태그' // header 에 문자열를 저장
        header.style.color = 'red' //h1의 스타일 색상 변경

        const body = document.querySelector('body') //header를 붙여야 하니까 body태그 불러오기
        body.appendChild(header) //header가 body태그 아래에 붙게됨. 붙이면 출력가능
        body.removeChild(header) //header가 body태그로 부터 제거가 됨. 그래서 출력된게 삭제됨.
        header.parentNode.removeChild(header)//위의 제거 메소드보다 이걸 더 많이 사용함.

      })
문서 객체를 만들었다고 문서 객체가 배치되는 것이 아니고, 문서를 어떤 문서 아래에 추가할지를 지정해줘야함.
어떤 문서 객체가 있을 때 위에 있는 것을 부모, 아래에 있는 것을 자식이라고 부름.
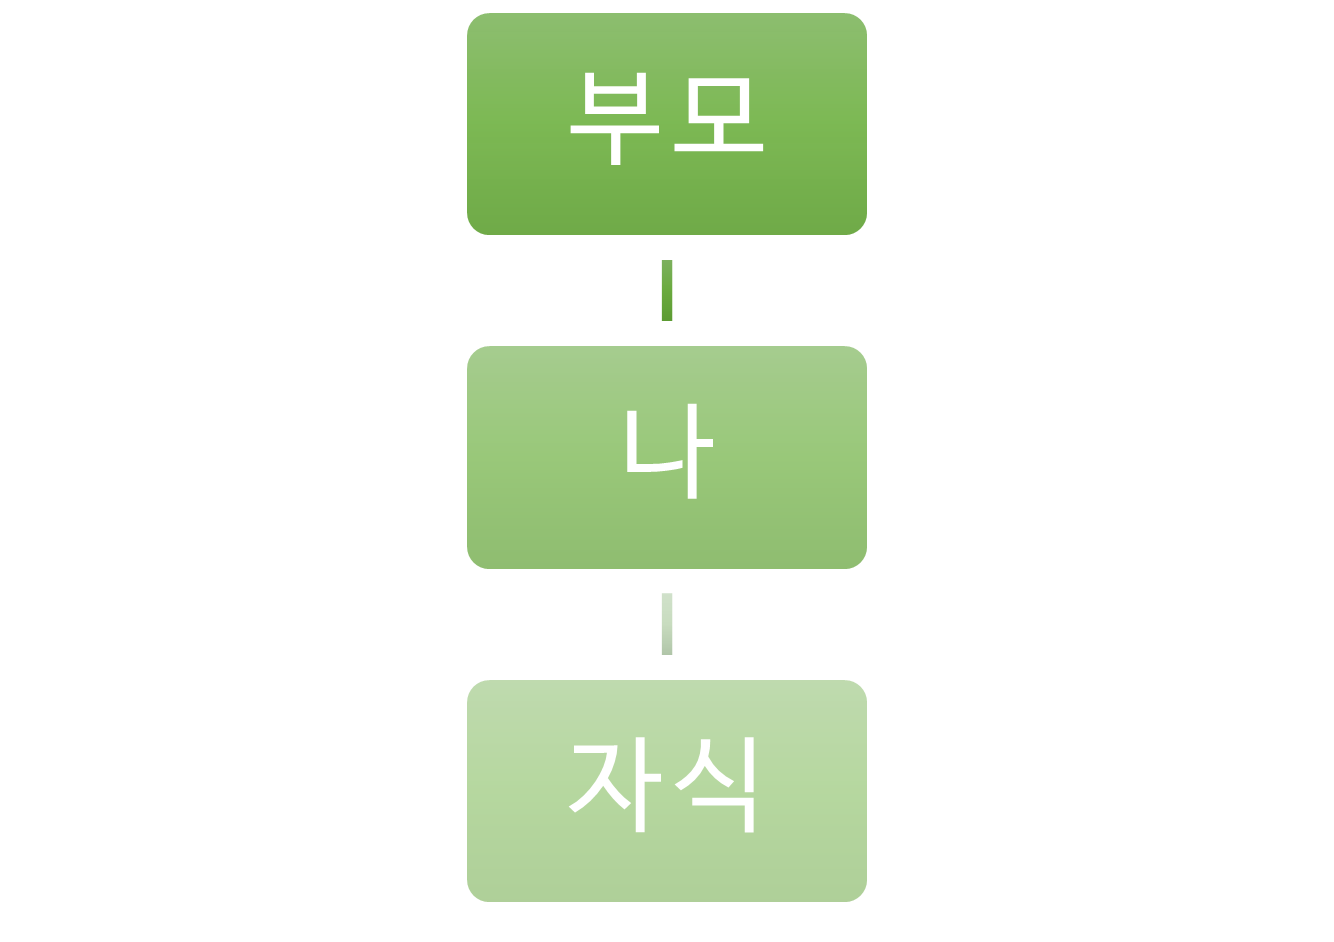
부모 객체.appendChild( 자식 객체 )
문서 객체 생성하고 추가하기 (document.createElement( )메소드로 h1 태그 생성하고, document.body태그 아래에 추가하는 코드)
<!DOCTYPE html>
<html>
<head>
   <title></title>
   <script>
      document.addEventListener('DOMContentLoaded', () => {
         //문서 객체 생성
         const header = document.createElement('h1')
         //생성한 태그 조작
         header.textContent = '문서 객체 동적으로 생성하기'
         header.setAttribute('data-custom', '사용자 정의 속성')
         header.style.color = 'white'
         header.style.backgroundColor = 'black'

         //h1 태그를 body 태그 아래에 추가
         document.body.appendChild(header)
      })
   </script>
</head>
<body>

</body>
</html>
문서 객체 이동하기
문서 객체 이동하기. appendChild( ) 괄호 안에 있는 태그에 붙이는 기능. 문서 객체를 이동할 때도 사용 가능.
문서 객체의 부모는 언제나 하나여야 함. 문서 객체를 다른 문서 객체에 추가하면 문서 객체가 이동한다.
<!DOCTYPE html>
<html>
<head>
   <title></title>
   <script>
      document.addEventListener('DOMContentLoaded', () => {
         //문서 객체 읽어들이고 생성
         const divA = document.querySelector('#first') //id속성이 first인 div태그 선택
         const divB = document.querySelector('#second') //id 속성이 second인 div태그 선택
         const h1 = document.createElement('h1') //h1태그 생성
         h1.textContent = '이동하는 h1태그'

         //서로 번갈아가면서 실행하는 함수를 구현
         const toFirst = () => {
            divA.appendChild(h1) // h1을 divA에 추가
            setTimeout(toSecond, 1000) // 1초 뒤에 toSecond 함수를 실행
         }
         const toSecond = () => {
            divB.appendChild(h1) //h1 divB에 추가
            setTimeout(toFirst, 10000) //10초 뒤에 toFirst 함수 실행
         }
         toFirst()
      })
   </script>
</head>
<body>
   <div id = "first">
      <h1>첫 번째 div 태그 내부</h1>
   </div>
   <hr>   //줄 넣기
   <div id = "second">
      <h1>두 번째 div 태그 내부</h1>
   </div>
</body>
</html>
1초마다 <h1>이동하는 h1태그 <\h1>라느 요소가 div#first(id 속성이 first인 div 태그)와 div#second로 움직이게 함.
문서 객체 제거하기 "removeChild( ) 메소드 사용"
부모 객체.removeChild(자식 객체)
appendChild( ) 메소드 등으로 부모 객체와 이미 연결이 완료된 문서 객체의 경우
parentNode속성으로 부모 객체에 접근 가능하므로, 일반적으로 문서 객체를 제거할 때는
문서 객체.parentNode.removeChild(문서 객체) 를 사용
<!DOCTYPE html>
<html>
<head>
   <title></title>
   <script>
      document.addEventListener('DOMContentLoaded', () => {
         setTimeout(() => {
            const h1 = document.querySelector('h1') //h1 태그의 부모 객체 body 태그에 접근하여 제거

            h1.parentNode.removeChild(h1)
            //documnet.body.removeChild(h1) //h1.paarentNode가 document.body이므로, 이런 형태로도 제거가능
         }, 3000)
      })
   </script>
</head>
<body>
   <hr>
   <h1>제거 대상 문서 객체</h1>
   <hr>
</body>
</html>
ㄴ 출력물은 3초가 지나면 출력물이 사라짐!
이벤트 설정하기
documnet.addEventListener('DOMContentLoaded', () => { }) 의 뜻 :
"document라는 문서 객체의 DOMContentLoaded 이벤트가 발생했을 때, 매개변수로 지정한 콜백 함수를 실행해라"
모든 문서 객체는 생성되거나 클릭되거나 마우스를 위에 올리거나 할 때 이벤트가 발생. 이 이벤트가 발생할 때 실행할 함수는 addEventListener( ) 메소드를 사용.
문서 객체.addEventListener(이벤트 이름, *콜백 함수)
*콜백 함수: 이벤트 리스너 또는 이벤트 핸들러라고 부름. 이벤트가 발생했을 때 호출할 함수.
<!DOCTYPE html>
<html>
<head>
   <title></title>
   <script>
      document.addEventListener('DOMContentLoaded', () => {
         let counter = 0
         const h1 = document.querySelector('h1')

         h1.addEventListener('click', (event) => {
            //h1 태그에 이벤트가 발생할 때 실행할 함수
            counter++
            h1.textContent = `클릭 횟수: ${counter}`
         })
      })
   </script>
   <style>
      h1 {
         /*클릭을 여러 번 했을 때 글자가 선택되는 것을 막기위한 스타일_드래그 불가*/
         user-select: none;
      }
   </style>
</head>
<body>
   <h1>클릭 횟수: 0</h1>
</body>
</html>
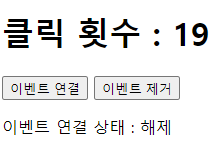
이벤트 제거
이벤트 제거
문서 객체.removeEventListener(이벤트 이름, 이벤트 리스너)
<!DOCTYPE html>
<html>
<head>
   <title></title>
   <script>
      document.addEventListener('DOMContentLoaded', () => {
         let counter = 0
         let isConnect = false

         const h1 = document.querySelector('h1')
         const p = document.querySelector('p')
         const connectButton = document.querySelector('#connect')
         const disconnectButton = document.querySelector('#disconnect')
         const listener = (event) => { //이벤트를 제거하려면 이벤트 리스너를 변수 또는 상수로 가지고 있어야 함.
            h1.textContent = `클릭 횟수 : ${counter++}`
         }

         connectButton.addEventListener('click', () => {
            if (isConnect === false) {
               h1.addEventListener('click', listener) //해제할 때 이벤트 리스너를 사용.
               p.textContent = '이벤트 연결 상태 : 연결'
               isConnect = true
            }
      })
      disconnectButton.addEventListener('click', () => {
         if (isConnect === true ) {
            h1.removeEventListener('click', listener)
            p.textContent = '이벤트 연결 상태 : 해제'
            isConnect = false
         }
      })
   })
   </script>
   <style>
      h1 {
         /* 클릭을 여러 번 했을 때 글자가 선택되는 것을 막기 위한 스타일 */
         user-select : none;
      }
   </style>
</head>
<body>
   <h1>클릭 횟수: 0</h1>
   <button id = "connect"> 이벤트 연결 </button>
   <button id = "disconnect">이벤트 제거</button>
   <p>이벤트 연결 상태: 해제</p>
</body>
</html>
아래 코드는 위의 코드보다 훨씬 읽기도 이해하기도 좋다.(저자 유튜브 강의에서 보여준 코드)
<!DOCTYPE html>
<html>
<head>
  <meta charset="UTF-8">
  <title>Document</title>
</head>
<body>
  <script>
  let counter = 0
  const listener = () => {
    header.textContent = `클릭 횟수 : ${++counter}`
  }
  const header = document.createElement('h1')
  header.style.userSelect = 'none'
  header.textContent = '클릭 횟수 : 0'

  const p = document.createElement('p')
  p.style.userSelect = 'none'
  p.textContent = '이벤트 연결 상태 : 해제'

  const connectButton = document.createElement('button')
  connectButton.textContent = '이벤트 연결 버튼'
  connectButton.addEventListener('click', () => {
    header.addEventListener('click', listener)
    p.textContent = '이벤트 연결 상태 : 연결'
  })


  const disConnectButton = document.createElement('button')
  disConnectButton.textContent = '이벤트 해제 버튼'
  disConnectButton.addEventListener('click', () => {
    header.removeEventListener('click', listener)
    p.textContent = '이벤트 연결 상태 : 해제'
  })

  document.body.appendChild(header)
  document.body.appendChild(p)
  document.body.appendChild(connectButton)
  document.body.appendChild(disConnectButton)
</script>
</body>
</html>
이벤트 활용
이벤트 모델 "이벤트를 연결하는 방법"
표준 이벤트 모델 : document.body.addEventListener('keyup', ( ) => { })
고전 이벤트 모델: document.body.onkeyup = (event) => { }
인라인 이벤트 모델: 고전 이벤트 모델 처럼 on어쩌구저쩌구 로 시작하는 속성을 HTML 요소에 직접 넣어서 이벤트를 연결하는 것. HTML 요소의 on어쩌구저쩌구 속성에 자바스크립트 코드를 넣는 것. 아래 코드를 보면 listener( ) 함수를 호출하고 있으며, 이때 on어쩌구저쩌구 속성 내부에서 변수 event를 활용할 수 있음. 이 변수를 listener( )함수의 매개변수로 전달함.
<script>
const listener = (event) => { }
</script>
<body = onkey ="listener(event)">
</body>
모든 이벤트 모델의 이벤트 리스너는 첫 번째 매개변수로 이벤트 객체를 받음.
키보드 이벤트
| 이벤트 | 설명 |
| keydown | 키가 눌릴 때 실행. 키보드를 꾹 누르고 있을 때도, 입력될 때도 실행. |
| keypress | 키가 입력되었을 때 실행. 하지만 웹 브라우저에 따라서 한국어, 중국어, 일본어를 제대로 처리 못하는 문제 발생 가능성 있음. (이 문제로 일반적으로 keyup 이벤트 사용) |
| keyup | 키보드에서 키가 떨어질 때 실행. |
키보드 이벤트는 이벤트 발생시점이 조금씩 다르다. keydown -> keypress -> 입력양식에 값이 들어감 ->keyup
keydown 과 keypress의 경우 입력값이 입력되기도 전에 실행이 되어버리고, 입력 양식에 값이 들어가고 키가 누르고 떨어질 때 keyup이 실행이 된다.
키보드 이벤트로 입력 양식의 글자 수를 세는 프로그램 만들기 (textarea에 keyup이벤트를 적용하여 입력한 글자 수를 세는 프로그램. textarea처럼 텍스를 입력하는 입력 양식의 값은 value 속성으로 읽어들임)
<!DOCTYPE html>
<html>
<head>
   <title></title>
   <script>
      document.addEventListener('DOMContentLoaded', () => {
         const textarea = document.querySelector('textarea')
         const h1 = document.querySelector('h1')

         textarea.addEventListener('keyup', (event) => {
            const length = textarea.value.length
            h1.textContent = `글자 수: ${length}`
         })
      })
   </script>
</head>
<body>
   <h1></h1>
   <textarea></textarea>
</body>
</html>
키보드 키 코드 사용하기
| 이벤트 속성 이름 | 설명 |
| code | 입력한 키 |
| keyCode | 입력한 키를 나타내는 숫자 |
| altKey | Alt 키를 눌렀는지 |
| ctrlKey | Ctrl 키를 눌렀는지 |
| shiftKey | Shift 키를 눌렀는지 |
code속성은 입력한 키를 나타내는 문자열이 들어있음. altKey, ctrlKey, shiftKey 속성은 해당 키를 눌렀는지 불 자료형 들어있음.
<!DOCTYPE html>
<html>
<head>
  <title></title>
  <script>
    document.addEventListener('DOMContentLoaded', () => {
      const h1 = document.querySelector('h1')
      const print = (event) => {
        let output = ''
        output += `alt : ${event.altKey}<br>`
        output += `ctrl : ${event.ctrlKey}<br>`
        output += `shift : ${event.shiftKey}<br>`
        output += `code : ${typeof(event.code) !== 'undefined'?
      event.code : event.keyCode}<br>`
      h1.innerHTML = output
      }

      document.addEventListener('keydown', print)
      document.addEventListener('keyup', print)
    })
  </script>
</head>
<body>
  <h1></h1>
</body>
</html>
ㄴ 위와 같은 코드처럼 단축키를 구현할 때 키보드 이벤트 속성을 사용한 것.
keyCode 속성은 입력한 키를 수자로 나타냄. 37,38,39,40이 방향키 왼쪽 위 오른쪽 아래를 나타냄. 이를 활용하여 화면에 별을 출력하고 이동하는 프로그램을 구현하면 다음과 같음.
<!DOCTYPE html>
<html>
<head>
  <title></title>
  <script>
    document.addEventListener('DOMContentLoaded', () => {
      //별의 초기 설정
      const star = document.querySelector('h1')
      star.style.position = 'absolute' //style속성을 조작하여 position 값을 설정

      //별의 이동을 출력하는 기능
      let [x, y] = [0, 0]
      const block = 20
      const print = () => {
        star.style.left = `${x * block}px`
        star.style.top = `${y * block}px`
      }
      print()

      //별을 이동하는 기능
      const [left, up, right, down] = [37, 38, 39, 40] //방향키 keycode를 쉽게 사용할 수 있도록 변수 사용해서 이름 붙임
      document.body.addEventListener('keydown', (event) => {
        switch (event.keyCode) {
          case left:
            x -= 1
            break
          case up:
            y -= 1
            break
          case right:
            x += 1
            break
          case down:
            y += 1
            break
        }
        print()
      })
    })
  </script>
</head>
<body>
  <h1>'ㅁ'</h1>
</body>
</html>
방향키를 꾹 누르고 있을 가능성이 많으므로 keydown 이벤트를 활용함.
이벤트 발생 객체
아래의 코드에서 이벤트의 주체가 textarea이므로 이벤트 발생객체는 textarea가 된다.
상황에 따라 이벤트 리스너 내부에서 변수에 접근할 수 없는 경우가 있음. 예를 들어 다음 코드에서는 listener( ) 함수 내부에서 textarea 변수에 접근할 수 없어 오류가 발생.
이벤트 리스너를 외부로 빼낸 경우
<script>
  const listener = (event) => {
    const length = textarea.value.length //현재 블록에서는 textarea 변수를 사용 불가
    h1.textContent = `글자 수 : ${length}`
  }

  document.addEventListener('DOMContentLoaded', () => { //이벤트 리스너가 외부로 분리되었음.
    const textarea = document.querySelector('textarea')
    const h1 = document.querySelector('h1')
    textarea.addEventListener('keyup', listener)
  })
</script>
코드의 규모가 커지면 이처럼 이벤트 리스너를 외부로 분리하는 경우가 많아짐. 이러한 경우 2가지 방법으로 문제를 해결 가능. 라이브러리와 프레임워크에 따라 선호하는 형태가 다름. 해당 라이브러리와 프레임워크의 문서를 살펴보면서 어떤 형태가 더 일반적으로 사용되는지 확인하고 활용해야함.
이벤트 발생 객체를 다른 형태로 추출을 해서 사용을 많이 한다.
첫째, event.currentTarget 속성을 사용
event.currentTarget이란 이벤트를 발생시킨 객체를 말함. 위에서는 textarea를 말함.
() => { } 와 function () {} 형태 모두 사용 가능
둘째, this 키워드를 사용
화살표 함수가 아닌 function ( ) { } 형태로 함수를 선언한 경우 사용
아래 코드에서 기존에 쓰던 첫번째 방법을 두번째와 세번째로 쓰더라도 같다
아래 코드의 첫번째의 textarea.value.length에서 textarea는 두번째의 event.currentTarget과 세번째 this 와 같다.
<!DOCTYPE html>
<html>
<head>
   <meta charset="UTF-8">
   <title>Document</title>
   <script>
      document.addEventListener('DOMContentLoaded', () => {
         const h1 = document.querySelector('h1')
         const textarea = document.querySelector('textarea')

      textarea.addEventListener('keyup', () => {  //첫번째
         h1.textContent = `글자 수: ${textarea.value.length}`
      })
      textarea.addEventListener('keyup', (event) => { //두번째
         h1.textContent = `글자 수: ${event.currentTarget.value.length}`
      })
      textarea.addEventListener('keyup', function () {  //세번째
         h1.textContent = `글자 수: ${this.value.length}`
      })
      })
   </script>
</head>
<body>
   <h1></h1>
   <textarea></textarea>
</body>
</html>
글자 입력 양식 이벤트
입력 양식: 버튼
버튼의 종류는 3가지가 있음.
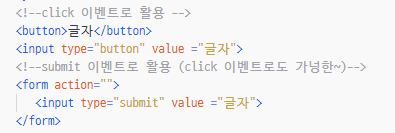
1. <button> <button>
2. <input type = "button" value = "글자">
3. <form action = "">
<input type = "submit" value = "글자"> //form 내부에 button 태그를 넣으면 submit 처럼 사용되므로 주의해야한다.
</form>
1, 2번째는 주로 click 이벤트로 활용이 되고, 3번째는 submit 이벤트로 활용한다.
위의 버튼을 활용하는 방법은 아래와 같다.
<!DOCTYPE html>
<html>
<head>
   <meta charset="UTF-8">
   <title>Document</title>
   <script> //1,2번째 버튼 활용하는 방법
      document.addEventListener('DOMContentLoaded', () => {
         const buttonA= document.querySelector('button')
         const buttonB= document.querySelector('input[type=button]')

         buttonA.addEventListener('click', (event) => {
            event.currentTarget.textContent += '글자'
         })
         buttonB.addEventListener('click', (event) => {
            event.currentTarget.value += '글자'
         })
      })
   </script>
</head>
<body>
   <!--click 이벤트로 활용 -->
   <button>글자</button>
   <input type="button" value ="글자">
   <!--submit 이벤트로 활용 (click 이벤트로도 가넝한~)-->
   <form action="">
      <input type="submit" value ="글자">
   </form>
</body>
</html>
세 번째는 form: 입력양식 이라는 뜻으로 form을 만들 때 form 태그를 활용하고, 제출할 때는 submit을 사용한다. form 태그를 이용하여 코드를 만들어보면 아래와 같이 나오는데 저 입력창에 문자열을 입력하면 주소의 뒤에 문자열이 입력이 되어 주소가 바뀌는 것을 알 수가 있다. 이는 주소를 바꾸면서 데이터를 다른 페이지에 전달하는 역할을 하게된다.
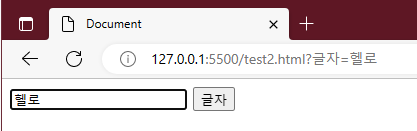
form 태그 내부에 button 태그를 만들면 정상작동이 되지않는다고 팝업이 뜨는 것을 눌러도 제출이 되기 때문에 그렇게 만들면 안되고, input type 버튼을 만들어야 오류가 나지 않는다.
<!DOCTYPE html>
<html>
<head>
   <meta charset="UTF-8">
   <title>Document</title>
   <script> //3번째 방법
      document.addEventListener('DOMContentLoaded', () => {
         const form = document.querySelector('form')
         form.addEventListener('submit', (event) =>{
            const text = document.querySelector('input[type=text]')
            if (text.value.indexOf('@') >= 0) {
               alert('정상 작동')
            } else {
               alert ('이메일 형식으로 작성해주세요')
               event.preventDefault()
            }
         }
      )}
   </script>
</head>
<body>
   <form action="">
      이메일을 입력해주세요<br>
      <input type="text" name ="text" id="">
      <input type="submit" value ="제출" id="">
   </form>
</body>
</html>
<!DOCTYPE html>
<html>
<head>
  <title></title>
  <script>
    document.addEventListener('DOMContentLoaded', () => {
      const input = document.querySelector('input')
      const p = document.querySelector('p')
      const isEmail = (value) => {
        // 골뱅이를 갖고 있고, && 골뱅이 뒤에 점이 있다면
        return (value.indexOf('@')> 1)
          && (value.split('@')[1].indexOf('.')>1)
      }
      input.addEventListener('keyup', (event)=> {
        const value = event.currentTarget.value
        if(isEmail(value)) {
          p.style.color = 'green'
          p.textContent = `이메일 형식입니다:${value}`
        } else {
          p.style.color = 'red'
          p.textContent = `이메일 형식이 아닙니다: ${value}`
        }
      })
    })
  </script>
</head>
<body>
  <input type = "text">
  <p></p>
</body>
</html>
ㄴ더 정확하게 인식하려면 isEmail( ) 함수를 수정. 일반적으로 이런 유효성 검사를 할 때는 정규 표현식regular expression 을 사용
입력양식: 글자 입력
글자 입력 시에는 세 가지 방법이 있다.
1. <input type="text" name="" id="">
2. <textarea name="" id="" cols="30" rows="10"></textarea>
3. <p contenteditable="true"></p>

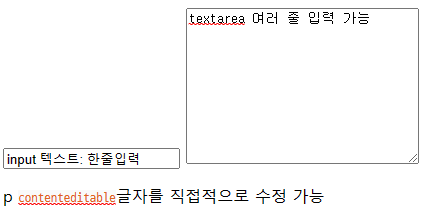
1,2번째 방법은 내부의 값을 불러오기 위해 value 속성을 활용하고, 주로 change 이벤트를 활용한다. 키보드와 관련되어 keyup, keydown도 가끔 사용된다.
change 이벤트 : 입력한 값의 종료 선언(엔터를 누르거나 입력창 바깥을 클릭)을 해야 실행됨. 예를 들어회원가입 비밀번호 입력창 같은 경우가 있다.
<!DOCTYPE html>
<html>
<head> //input 태그를 이용한 inch -> cm
   <meta charset="UTF-8">
   <title>Document</title>
   <script>
      document.addEventListener('DOMContentLoaded', () => {
         const input = document.querySelector('input')
         const button = document.querySelector('button')
         const p = document.querySelector('p')

         button.addEventListener('click', ()=> {
           p.textContent = `${Number(input.value) * 2.54}cm 입니다`
         })
      })
   </script>
</head>
<body>
   <input type="text" name="" id="">
   <button>계산</button>
   <p></p>
</body>
</html>
이를 textarea로 바꿀 수도 있다.
이제 버튼을 클릭하지 않고도 숫자를 입력하기만 하면 바로 inch에서 cm 로 바뀌는 코드를 작성해보면 아래와 같다. 버튼과 관련된 걸 주석 처리하고 이벤트 발생 객체를 input으로 하면 된다.
<!DOCTYPE html>
<html>
<head>
   <meta charset="UTF-8">
   <title>Document</title>
   <script>
      document.addEventListener('DOMContentLoaded', () => {
         const input = document.querySelector('input')
         //const button = document.querySelector('button')
         const p = document.querySelector('p')

         input.addEventListener('keyup', ()=> {
           p.textContent = `${Number(input.value) * 2.54}cm 입니다`
         })
      })
   </script>
</head>
<body>
   <input type="text" name="" id="">inch<br>
   <!--<button>계산</button>-->
   <p></p>
</body>
</html>
아래 코드는 숫자가 아닌 걸 입력했을 때의 예외도 생각한 코드이다.
<!DOCTYPE html>
<html>
<head>
  <title></title>
  <script>
    document.addEventListener('DOMContentLoaded', () => {
      const input = document.querySelector('input')
      const button = document.querySelector('button')
      const p = document.querySelector('p')

      button.addEventListener('click', () => {
        // 입력을 숫자로 변환
        const inch = Number(input.value)
        // 숫자가 아니라면 바로 리턴
        if (isNaN(inch)) {
          p.textContent = '숫자를 입력해주세요'
          return
        }
        // 변환해서 출력
         const cm = inch * 2.54
         p.textContent = `${cm}cm`
      })
    })
  </script>
</head>
<body>
  <input type = "text"> inch <br>
  <button>계산</button>
  <p></p>
</body>
</html>l
ㄴ isNaN( ) 함수의 결과가 ture로 나오는 숫자가 아닌 경우 바로 return 키워드로 리턴해서 이후의 코드를 실행하지 않음. else키워드를 사용할 수도 있지만 위와 같이 사용하면 들여쓰기 단계를 하나 줄일 수 있어서 코드가 깔끔해짐.
자주 사용되는 형태의 코드라서 조기 리턴 early return이라고 붙은 패턴임.
입력양식: 드롭 다운
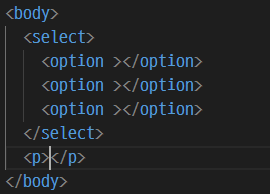
드롭 다운 목록은 기본적으로 select 태그로 구현. 아래는 select 태그를 사용해서 드롭 다운 목록을 만들고 드롭 다운 목록을 선택했을 때 (값이 변경되었을 때) 어떤 것을 선택했는지 출력하는 코드임.
<!DOCTYPE html>
<html>
<head>
  <title>\</title>
  <script>
    document.addEventListener('DOMContentLoaded', () => {
      const select = document.querySelector('select')
      const p = document.querySelector('p')

      select.addEventListener('change', (event) => {
        const options = event.currentTarget.options
        const index = event.currentTarget.options.selectedIndex

        p.textContent = `선택: ${options[index].textContent}`
      })
    })
  </script>
</head>
<body>
  <select>
    <option>떡볶이</option>
    <option>순대</option>
    <option>오뎅</option>
    <option>튀김</option>
  </select>
  <p>선택: 떡볶이</p>
</body>
</html>
<p> 선택: 떡볶이 </p>를 넣은 이유는 처음 저 코드를 실행하게 되면 드롭박스 내에 떡볶이가 초깃값으로 되어있기 때문에 일부러 그렇게 만들어준거임.
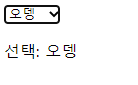

드롭 다운 목록에서 항목을 선택하면 options[index]에서 선택한 option태그가 출력됨. 현재 코드에서는 textContent 속성을 바로 추출사용했으나, option 태그에 다른 속성들을 부여하고 속성을 활용가능.
입력양식: 드롭 다운 (multiple select 태그)
" ctrl키 또는 shift키를 누르고 여러 항목 선택 가능"
<!DOCTYPE html>
<html>
<head>
  <title>\</title>
  <script>
    document.addEventListener('DOMContentLoaded', () => {
      const select = document.querySelector('select')
      const p = document.querySelector('p')

      select.addEventListener('change', (event) => {
        const options = event.currentTarget.options
        const list = [ ]
        for (const option of options) {
          if (option.selected) {
            list.push(option.textContent)
          }
        }
        p.textContent = `선택: ${list.join(',')}`
      })
    })
  </script>
</head>
<body>
  <select multiple>
    <option>떡볶이</option>
    <option>순대</option>
    <option>오뎅</option>
    <option>튀김</option>
  </select>
  <p></p>
</body>
</html>

cm단위를 여러 단위로 변환하는 프로그램
<!DOCTYPE html>
<html>
<head>
  <title></title>
  <script>
    document.addEventListener('DOMContentLoaded', () => {
      let 현재값
      let 변환상수 = 10

      const select = document.querySelector('select')
      const input = document.querySelector('input')
      const span = document.querySelector('span')

      const calculate = () => {
        span.textContent = (현재값 * 변환상수).toFixed(2)
      }

      select.addEventListener('change', (event) => {
        const options = event.currentTarget.options
        const index = event.currentTarget.options.selectedIndex
        변환상수 =  Number(options[index].value)
        calculate()
      })

      input.addEventListener('keyup', (event) => {
        현재값 = Number(event.currentTarget.value)
        calculate()
      })
    })
  </script>
</head>
<body>
  <input type = "text">cm =
  <span></span>
    <select>
      <option value = "10">mm</option>
      <option vlaue = "0.01">m</option>
      <option value = "0.393701">inch</option>
    </select>
  </span>
</body>
</html>
입력 양식: 체크박스 활용하기
<!DOCTYPE html>
<html>
<head>
   <title></title>
   <script>
    document.addEventListener('DOMContentLoaded', () => {
        let [timer, timerId] = [0, 0]
        const h1 = document.querySelector('h1')
        const checkbox = document.querySelector('input')

        checkbox.addEventListener('change', (event) => {
            if (event.currentTarget.checked) {
                //체크 상태
                timerId = setInterval(() => {
                    timer += 1
                    h1.textContent = `${timer}초`
                }, 1000)
            } else {
                //체크 해제 상태
                clearInterval(timerId)
            }
        })
    })
   </script>
</head>
<body>
    <input type ="checkbox">
    <span>타이머 활성화</span>
    <h1></h1>
</body>
</html>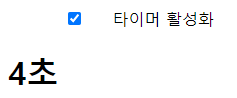
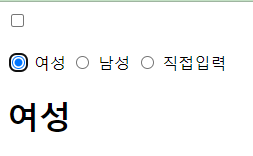
입력양식: 라디오 버튼 활용하기
라디오 버튼은 여러 대상 중 하나를 선택하는 용도로 라디오 버튼을 여러 개 사용하게 된다. 여러 개의 라디오 버튼이 한 그룹인것을 나타내기 위해 name 부분에 같은 이름을 지정해서 사용해줘야한다.

change 이벤트 사용하고, checked 속성을 사용한다.
<!DOCTYPE html>
<html lang="en">
<head>
<meta charset="UTF-8">
<meta http-equiv="X-UA-Compatible" content="IE=edge">
<meta name="viewport" content="width=device-width, initial-scale=1.0">
<title>Document</title>
<script>
document.addEventListener('DOMContentLoaded', () =>{
const checkbox = document.querySelector('input[type=checkbox]')
const checkboxResult = document.querySelector('h1#checkbox')
checkbox.addEventListener('change', () =>{
if (checkbox.checked) {
checkboxResult.textContent = '체크'
} else {
checkboxResult.textContent = '해제'
}
})
const radios = document.querySelectorAll('input[type=radio][name=gender]')
const radioResult = document.querySelector('h1#radiobutton')
radios.forEach((radio) => {
radio.addEventListener('change', (event) => {
radioResult.textContent = event.currentTarget.value
})
})
})
</script>
</head>
<body>
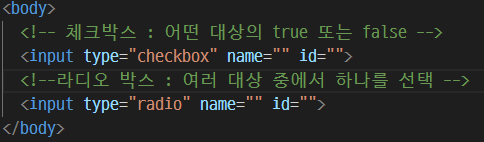
<!-- 체크박스 : 어떤 대상의 true 또는 false -->
<input type="checkbox" name="" id="">
<h1 id = "checkbox"></h1>
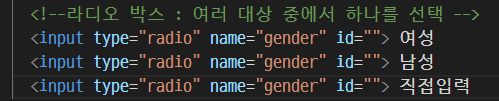
<!--라디오 박스 : 여러 대상 중에서 하나를 선택 -->
<input type="radio" name="gender" id="" value = "여성"> 여성
<input type="radio" name="gender" id="" value = "남성"> 남성
<input type="radio" name="gender" id="" value = "직접입력"> 직접입력
<h1 id = "radiobutton" ></h1>
</body>
</html>
<!DOCTYPE html>
<html>
<head>
  <title></title>
  <script>
  document.addEventListener('DOMContentLoaded', () => {
      //문서 객체 추출하기
      const output = document.querySelector('#output')
      const radios = document.querySelectorAll('[name=pet]')

      //모든 라디오 버튼에
      radios.forEach((radio) => {
        //이벤트 연결
          radio.addEventListener('change', (event) => {
            const current = event.currentTarget
              if (currnet.checked) {
                output.textContent = `좋아하는 애완동물은 ${currnet.value}이시군요`
              }
          })
        })
      })
   </script>
</head>
<body>
  <h3>#좋아하는 애완동물을 선택해주세요</h3>
  <input type = "radio"name = "pet" vlaue = "강아지">
  <span>강아지</span>
  <input type = "radio"name = "pet" vlaue = "고양이">
  <span>고양이</span>
  <input type = "radio"name = "pet" vlaue = "햄스터">
  <span>햄스터</span>
  <input type = "radio"name = "pet" vlaue = "기타">
  <span>기타</span>
  <hr>
  <h3 id = "output"></h3>
</body>
</html>
ㄴ name 속성을 입력하지 않으면 라디오 버튼을 여러 개 선택 할 수 있음. 카테고리 구분 없이 선택할 수 있으며, 한번 선택하고 나면 선택을 취소 할 수 없음. 라디오 버튼을 사용할 때는 꼭 name 속성과 함께 사용해야함.
기본 이벤트 막기
기본 이벤트: 어떤 이벤트가 발생했을 때 웹 브라우저가 기본적으로 처리해주는 것 (예: 링크를 클릭했을 때 이동하는 것, 제출 버튼을 눌렀을 때 이동하는 것 등)
기본 이벤트 제거 " preventDefault( ) 메소드 사용"
아래는 모든 img 태그의 contextmenu 이벤트가 발생할 때 preventDefault( ) 메소드를 호출해서 기본 이벤트를 막는 코드임.
이미지 마우스 오른쪽 버튼 클릭(contextmenu) 막기 (불펌 막기)
<!DOCTYPE html>
<html>
<head>
  <title></title>
  <script>
    document.addEventListener('DOMContentLoaded', () => {
      const imgs = document.querySelectorAll('img')

      imgs.forEach((img) => {
        img.addEventListener('contextmenu', (event) => {
          event.preventDefault()
        })
      })
    })
  </script>
</head>
<body>
  <img src = "http://placekitten.com/300/300" alt = "">
</body>
</html>
체크 때만 링크 활성화하기
<!DOCTYPE html>
<html>
<head>
  <title></title>
  <script>
    document.addEventListener('DOMContentLoaded', () => {
      let status = false
      const checkbox = document.querySelector('input')
      checkbox.addEventListener('change', (event) => {
        status = event.currentTarget.checked
      })

      const link - document.querySelector('a')
      link.addEventListener('click', (event) => {
        if (!status) {
          event.preventDefault()
        }
      })
    })
  </script>
</head>
<body>
  <input type = "checkbox">
  <span> 링크 활성화 </span>
  <br>
  <a href = "http://hanbit.co.kr">한빛미디어</a>
</body>
</html>
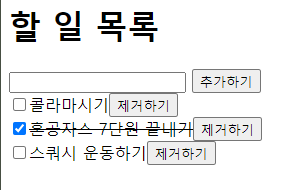
할 일 목록 만들기
<!DOCTYPE html>
<html>
<head>
  <title></title>

  <body>
    <h1>할 일 목록</h1>
    <input id = "todo">
    <button id="add-button">추가하기</button>
    <div id="todo-list">

    </div>
  </body>
  <script>
    document.addEventListener('DOMContentLoaded', () => {
      //문서 객체 가져옴.
      const input = document.querySelector('#todo')
      const todoList = document.querySelector('#todo-list')
      const addButton = document.querySelector('#add-button')

      //변수 선언
      let keyCount = 0

      //함수 선언
      const addTodo = () => {
        //입력 양식에 내용이 없으면 추가 안함.
        if (input.value.trim() === '') {
          alert('할 일을 입력해주삼')
          return
        }

        //문서 객체를 설정
        const item = document.createElement('div')
        const checkbox = document.createElement('input')
        const text = document.createElement('span')
        const button = document.createElement('button')

        //문서 객체 식별할 키를 생성
        const key = keyCount
        keyCount += 1

        //item 객체를 조작하고 추가
        item.setAttribute('data-key', key)
        item.appendChild(checkbox)
        item.appendChild(text)
        item.appendChild(button)
        todoList.appendChild(item)

        //checkbox 객체 조작
        checkbox.type = 'checkbox'
        checkbox.addEventListener('change', (event) => {
          item.style.textDecoration
            = event.target.checked ? 'line-through' : ''
        })

        //text 객체를 조작
        text.textContent = input.value

        //button 객체를 조작
        button.textContent = '제거하기'
        button.addEventListener('click', () => {
          removeTodo(key)
        })

        //입력 양식의 내용을 비움
        input.value = ''
      }

      const removeTodo = (key) => {
        //식별 키로 문서 객체 제거
        const item = document.querySelector(`[data-key="${key}"]`)
        todoList.removeChild(item)
      }
      //이벤트 연결
      addButton.addEventListener('click', addTodo)
      input.addEventListener('keyup', (event) => {
        //입력 양식에서 Enter 키를 누름녀 바로 addTodo() 함수 호출
        const ENTER = 13
        if (event.keyCode === ENTER) {
          addTodo()
        }
      })
    })
  </script>
</head>
<body>

</body>
</html>
'IT > 자바스크립트' 카테고리의 다른 글
| [혼공자스]09.클래스 (0) | 2022.12.05 |
|---|---|
| [혼공자스] 08. 예외처리 (0) | 2022.12.05 |
| [혼공자스] 06. 객체 (0) | 2022.11.18 |
| 자바스크립트 실수 모음집 (0) | 2022.11.18 |
| [혼공자스] 05. 함수 (0) | 2022.11.17 |


