[항해99_chatGPT 웹개발 완전정복] 3-4주차 강의 TIL
Flask
설치방법: 1. python 가상환경을 구축 2. flask 기본 폴더 구조를 만들어준다. 3. 터미널에 pip install flask 입력하여 설치
가상환경 venv : 웹을 만드는데 사용할 편리한 도구 모음, 라이브러리를 담아둘 공구함
| Flask 폴더 구조 (폴더 구조가 정해져 있음) flask |— venv |— app.py (서버) _파일명을 변경해도 되지만, 라이브러리 이름과 같은 것을 이름으로 사용X |— templates |— index.html (클라이언트 파일) |
flask 기본 골격
from flask import Flask
app =Flask (__name__)

@app .route ('/') #이 부분을 여러 개 만들어서 주소를 분할할 수 있음. # 주소에 아무것도 안넣었을 때 웹페이지 주소임.
def home ():
   return 'This is Home!‘

if __name__=='__main__':
   app .run (debug =True )
@app .route ('/')
def home ():
   return 'This is Home!‘ #이 부분을 여러 개 만들어서 주소를 분할 할 수 있음.

@app .route ('/mypage ')# 대신 /다음과 함수명이 다른 것과 달라야함.
def mypage ():
   return 'This is Home!'
flask의 내장함수 render_template 이용 -> html파일을 불러올 수 있음(단, import해줘야함)
1. 데이터 넘기기
1-1. 단일 데이터 넘기기
from flask import Flask ,render_template
app =Flask (__name__)
@app .route ('/')
def home ():
    name = ‘바보’
   return render_template ('index.html ', data = name ) # data = name 로 하면, app.py에서 사용한 name 이라는 변수를 data에 넣고, html에서 data 변수를 사용할 수 있음.
(app.py에 있는 데이터를 index.html로 불러올 수 있다는 말임)
▲ app.py 파일임
<!DOCTYPE html >
<html lang ="en ">
<head >
   <meta charset ="UTF-8 ">
   <meta name ="viewport " content ="width=device-width, initial-scale=1.0 ">
   <title >Document </title >
</head >
<body >
   <h1 >안녕하시오. {{ data }}</h1 >
</body >
</html >
▲ template / index.html 파일임
1-2. 데이터 여러 개 넘겨주기
객체 사용 -> 묶어서 보내줌 (왜냐면, data = name에 변수가 하나 밖에 못들어가니까 객체로묶고, 이용할 때는 키를 이용하여 값을 출력하는 방식으로 진행)
물과 얼음에 비유한다면 물은 app.py에 있고, 얼음을 얼릴 얼음틀은 index.html에 있음.
@app .route ('/')
def home ():
   name ='바보 '
   lotto =[1 ,2 ,3 ,4 ,5 ]
   context ={
     "name ":name ,
     "lotto ":lotto ,
   }
   return render_template ('index.html ',data =context )
<body >
<h1 >안녕하시오. {{ data.name }}</h1 >
<h1 >번호는 {{ data.lotto }}</h1 >
</body >
- for반복문 이용. (flask에서 for문의 단축어 ffor) ref) flask에서 if문 단축어 fif, ifelif
<body >
   <h1 >안녕하시오. {{ data.name }}</h1 >
   <h1 >번호는 {{ data.lotto }}</h1 >
   <ol >
     {% for number in data.lotto %}
         {{ number }}
     {% endfor %}
   </ol >
</body >
- flask에서 이미지 사용 시 (body태그)
작업 폴더 내 static 폴더 생성 후 그 안에 사용할 이미지 넣어준다.
<img src ="{{ url_for('static', filename='이미지 경로') }}" alt ="">위를 아래처럼 사용하면 됨. (이미지 경로는 파일 이동 후 파일 위에서 마우스 오른쪽 클릭 -> 상대 경로복사 누르면 위치가 복사됨 ->이미지경로에 붙여넣기 (주의점. 상대 경로 복사하면 파일명에 폴더위치까지 표시되니까 폴더위치는 제거해야함)
- flask환경에서 검색어 받아오기
form(회원가입, 검색, 게시글 작성에 사용): 데이터를 입력하고 전송버튼을 누르면 입력한 데이터가 서버로 전송됨.
<form action ="{{ url_for('movie') }}">
	<input type ="text " name ="query ">
	<button type ="submit ">검색 </button >
action - url_for : 데이터를 보낼 곳.(/movie 페이지) / input - name 속성 : 데이터에 명찰을 붙여줌. 데이터 이름이 query.=> “form(input/ button)으로 받은 정보를 movie 페이지로 보내주는데 데이터 이름은 query로 보내줄 것이다.“ 라는 뜻
- request.args.get(name 속성명) : form에서 입력한 데이터를 받아올 수 있음
@app .route ('/movie ')
def movie ():
   print (request .args .get ('query '))
   return render_template ('movie.html ')
- URL주소에서 데이터 가져오기
인스타그램을 보면 주소에 따라서 데이터가 변경됨.
https://www.instagram.com/spartacodingclub/ → 스파르타 공식 인스타 계정
https://www.instagram.com/iamrtanny/ → 르타니 계정
이건 주소창에 `spartacodingclub` 이나 `iamrtanny`와 같은 문자열들을 가지고 와서 변수처럼 사용할 수 있어서 가능한 것임. 이처럼 주소에 따라 메인 화면 인사말 바꾸기
@app .route ('/iloveyou/<name>/')
def iloveyou (name ):
   motto =f "{name }야 난 너뿐이야"
   context ={
     "name ":name ,
     "motto ":motto
   }
   return render_template ('motto.html ',data =context )
route()` 부분의 <>를 사용하여(<name>처럼) 변수처럼 사용가능. URL 주소에 따라서 name을 변수처럼 사용가능. (파라미터로 사용가능) 예를 들면 `http://127.0.0.1:8080/iloveyou/jiwoong` 이라면 name에는 jiwoong이 들어가고, `http://127.0.0.1:8080/profile/minky` 라면 name에는 minky가 들어감.
- 페이지 이동 기능 만들기(html에서)
html에서 href 속성을 {{ url_for('이동할 곳') }} 이용. (‘이동할 곳‘은 app.py의 함수 이름)
<li class ="nav-item ">
	<a class ="nav-link " text-white href ="{{ url_for('answer')}}"> Searching BoxofficeRank </a >
</li >▲html 파일
DB
index순서로 데이터들이 정렬되어 있음.
DB의 종류 – RDBMS(SQL) : 표(엑셀과 유사) ex)SQLite, MS-SQL, My-SQL 등
DB의 종류 – No-SQL : 딕셔너리 형태로 데이터를 저장. 자유로운 형태. ex)MongoDB
DB는 일반적으로 파일로 저장.
SQLite사용 할 것임. => vscode 확장팩 설치해야함.(SQLite3 Editor)
환경설정을 위한 작업
현재 폴더에서 database.db 파일 생성
파일 위에서 마우스 오른쪽 클릭 -> 연결프로그램(open with) 클릭 -> *.db...에 대한 기본 편집기 선택 (configure default editor for*.db...) 클릭 -> SQLite3 Editor 클릭
ORM(Object Relational Mapping) : 프로그래밍 언어(지금은 python)으로 DB를 다루는 방법
SQLAlchemy
SQLAlchemy로 DB연결하기 & 테이블 만들기
1. python으로 SQLAlchemy를 다루려면 가상환경을 셋팅해줘야함.
| DB 폴더 구조 |— venv |— app.py (서버) |— database.db (데이터베이스) |
2. pip install Flask-SQLAlchemy 터미널 입력 (꼭 가상환경 상태에서 설치하기)
3. flask 와 DB연결하는 코드 사용
from flask import Flask
import os
from flask_sqlalchemy import SQLAlchemy
basedir =os.path.abspath (os.path.dirname (__file__))
app =Flask (__name__)
app .config ['SQLALCHEMY_DATABASE_URI ']=\
     'sqlite:///'+os .path .join (basedir,'database.db ')
db =SQLAlchemy (app )
▲ .py에 넣어야함. (app.py)
4. 데이터베이스 모델을 정의한다. (엑셀로 치면 Song이라는 테이블을 만든 것)
class Song (db .Model ):
   id =db .Column (db .Integer ,primary_key =True )
   username =db .Column (db .String ,nullable =False )
   artist =db .Column (db .String ,nullable =False )
   title =db .Column (db .String ,nullable =False )
   image_url =db .Column (db .String ,nullable =False )

   def __repr__(self ):
     return f '{self .artist }{self .title } 추천 by {self .username }'

with app .app_context ():
   db .create_all ()
5. DB만들기
(가상환경 상태 확인) -> 터미널에 명령어 입력: flask shell (엔터) -> 코드를 쓸 수 있는 상태가 됨
- 테이블 만들기
(.venv)
krist@Jeongyoonyoung MINGW64 ~/Desktop/practicemyself/frontend/flask
$ flask shell
Python 3.11.5 (tags/v3.11.5:cce6ba9, Aug 24 2023, 14:38:34) [MSC v.1936 64 bit (AMD64)] on win32
App: app
Instance: C:\Users\82107\Desktop\practicemyself\frontend\flask\instance
>>> from app import db, Song
>>> db.create_all()
>>> db.drop_all()
.create_all() : 테이블(시트) 생성
.drop_all() : 테이블(시트) 전체 삭제
SQLAlchemy로 DB 조작하기
조작 전 확인사항 : 1. 가상환경 켜져 있는지 확인 -> 2. 터미널에 flask shell이 켜져있는지 확인
1. 입력
1-1) 단일 정보 입력
song = Song (username ="추천자 ",title ="노래제목 ",
       artist ="가수 ",image_url ="이미지 주소 ")
db .session .add (song ) # DB에 업로드
db .session .commit ()   # DB에 저장
1-2) 복수 정보 입력
song1 =Song (username ="추천자 ",title ="노래제목1 ",
       artist ="가수1 ",image_url ="이미지 주소1 ")
song2 =Song (username ="스파르타 ",title ="노래제목2 ",
       artist ="가수2 ",image_url ="이미지 주소2 ")
song3 =Song (username ="스파르타 ",title ="노래제목3 ",
       artist ="가수3 ",image_url ="이미지 주소3 ")
db .session .add (song1 )
db .session .add (song2 )
db .session .add (song3 )
db .session .commit ()
2. 조회
2-1. 모든 결과값 보기
테이블이름.query.all( )을 실행 -> DB에 있는 모든 데이터 조회가능. 조회 시 데이터 표시 형식은 class Song에서 지정한 상태로 나옴.
>>> Song.query.all()
[가수 노래제목 추천 by 추천자, 가수1 노래제목1 추천 by 추천자, 가수2 노래제목2 추천 by 스파르타, 가수3 노래제목3 추천 by 스파르타, 호랑나비 호랑나비 추천 by 김아무개]
2-2. DB에서 가져온 데이터 -> 리스트 형식으로 사용 가능
>>> song_list = Song.query.all()
>>> song_list[3]
가수3 노래제목3 추천 by 스파르타
2-3. 객체처럼 속성 값 ->데이터 사용 가능
>>> song_list[0].title
'노래제목'
2-4. 특정 조건으로 조회
Song.query.filter_by(조건).all() 사용 -> 조건에 맞는 데이터 전부 조회 가능
>>> Song.query.filter_by(username='스파르타').all()
[가수2 노래제목2 추천 by 스파르타, 가수3 노래제목3 추천 by 스파르타]
원하는 데이터 1개만 갖고오려면 .first() 써주면 됨
>>> Song.query.filter_by(id=3).first()
가수2 노래제목2 추천 by 스파르타
>>> Song.query.filter_by(title='호랑나비').first()
호랑나비 호랑나비 추천 by 정윤영
3. 수정
데이터를 가져오고, 변수의 값을 변경하는 것처럼 수정 가능.
수정사항을 반영하기 위해서는 꼭 add( ) 와 db.session.commit( )을 해줘야함.
>>> song_data = Song.query.filter_by(id=4).first()
>>> song_data.title = '변경된 제목'
>>> db.session.add(song_data)
>>> db.session.commit()
4. 삭제
데이터를 가져오고, db.session.delete( )로 삭제. 수정과 마찬가지로 db.session.commit( ) 해줘야함.
>>> delete_data = Song.query.filter_by(id=4).first()
>>> db.session.delete(delete_data)
>>> db.session.commit()
#1 boxoffice_list = rjson.get("boxOfficeResult").get("weeklyBoxOfficeList")
#2 boxoffice_list = rjson.["boxOfficeResult"]["weeklyBoxOfficeList"]
영화 진흥 위원회에서 박스오피스 순위를 받아오는 과정에서 객체로 구성되어있는 API를 키값으로 불러오려고 시도했다.(#2) 그러나 안되었고, get이라는 방법을 찾았다.
근데 또 어쩔땐 #2방법이 된다? 어쩌라는 거임? 왜 그런지는 아직 못찾음; 얼탱무
requests, bs4를 통해 멜론사이트에서 100위의 차트의 정보를 받아와 flask를 통해 사이트에 보여주는걸 하고 있었다.
from flask import Flask, render_template
from bs4 import BeautifulSoup
import requests

app = Flask(__name__)

@app.route('/')
def index():
    return render_template('index.html')

@app.route('/melon')
def melon():
    url ="https://www.melon.com/chart/"
    headers = {'User-Agent':'Mozilla/5.0 (Windows NT 10.0; Win64; x64)AppleWebKit/537.36 (KHTML, like Gecko) Chrome/73.0.3683.86 Safari/537.36'}
    data = requests.get(url, headers =headers)
    soup = BeautifulSoup(data.text,'html.parser')

    melon_data = []
    trs = soup.select('table > tbody > tr')
    for tr in trs :
        rank =tr.select_one('.rank').text
        title =tr.select_one('..rank01 > span > a').text
        artist =tr.select_one('.rank02 > a').text
        img_url =tr.select_one('img')['src']

        melon_data.append({
            "rank" : rank,
            "title" : title,
            "artist" : artist,
            "img_url" : img_url
        })


    return render_template('melon.html', data = melon_data)

if __name__ == '__main__':
    app.run()
<!Doctype html>
<html lang="en">
<head>
<meta charset="utf-8">
<meta name="viewport" content="width=device-width, initial-scale=1">
<title>멜론 음악 순위 사이트</title>
<link href="https://cdn.jsdelivr.net/npm/bootstrap@5.3.0/dist/css/bootstrap.min.css" rel="stylesheet"
integrity="sha384-9ndCyUaIbzAi2FUVXJi0CjmCapSmO7SnpJef0486qhLnuZ2cdeRhO02iuK6FUUVM" crossorigin="anonymous">
<style>
.background-banner {
background-image: linear-gradient(45deg,
rgba(124, 211, 53, 0.849),
rgb(207, 234, 0));
max-height: 100%;
background-position: center;
background-size: cover;
background-repeat: no-repeat;
background-attachment: fixed;
color: white;
}
@import url("https://cdn.jsdelivr.net/npm/bootstrap-icons@1.11.1/font/bootstrap-icons.css");
</style>
<link rel="stylesheet" href="https://cdn.jsdelivr.net/npm/bootstrap-icons@1.11.1/font/bootstrap-icons.css">
</head>
<div class="background-banner">
<!-- navbar -->
<body data-bs-theme="dark">
<nav class="navbar border-bottom border-body d-flex justify-content-space-between" data-bs-theme="dark">
<img src="https://s3.ap-northeast-2.amazonaws.com/materials.spartacodingclub.kr/webjong/images/sparta-logo.svg" alt="">
<div class="navbarMenu">
<nav class="navbar navbar-expand-lg">
<div class="container-fluid">
<button class="navbar-toggler" type="button" data-bs-toggle="collapse" data-bs-target="#navbarNav"
aria-controls="navbarNav" aria-expanded="false" aria-label="Toggle navigation">
<span class="navbar-toggler-icon"></span>
</button>
<div class="collapse navbar-collapse" id="navbarNav">
<ul class="navbar-nav">
<li class="nav-item">
<a class="nav-link text-white" aria-current="page" href="#">Home</a>
</li>
<li class="nav-item">
<a class="nav-link text-white" href="#">Music</a>
</li>
<li class="nav-item">
<a class="nav-link text-white" href="#">Album</a>
</li>
<li class="nav-item">
<a class="nav-link text-white" aria-disabled="true">Movie</a>
</li>
</ul>
</div>
</div>
</nav>
</div>
</nav>
<!-- main -->
<div class="px-4 py-5 my-5 text-center">
<h1 class="display-5 fw-bold text-body-emphasis">Melody Share</h1>
<br>
<div class="col-lg-6 mx-auto">
<p class="lead mb-4">노래를 들으면 생각나는 누군가가 있으신가요?</p>
<br>
<p class="lead mb-4">당신의 감성이 담긴 인생곡 플레이리스트</p>
<p class="lead mb-4">멜로디쉐어에서 소중한 사람과 함께하세요</p>
<div class="d-grid gap-2 d-sm-flex justify-content-sm-center">
<button type="button" class="btn btn-danger" data-bs-toggle="modal"
data-bs-target="#staticBackdrop">
음악추가
</button>
</div>
</div>
</div>
<!-- Card -->
<div class="row row-cols-1 row-cols-md-4 g-4 mx-auto w-75 pb-5">
{% for music in data %}
<div class="col">
<div class="card">
<img src="{{ music.img_url }}" class="card-img-top" alt="...">
<div class="card-body">
<h5 class="card-title">{{ music.rank }}</h5>
<p class="card-text">{{ music.title }}</p>
<p class="card-text">{{ music.artist }}</p>
</div>
</div>
{% endfor %}
</div>
</div>
<!-- Modal -->
<div class="modal fade" id="staticBackdrop" data-bs-backdrop="static" data-bs-keyboard="false" tabindex="-1"
aria-labelledby="staticBackdropLabel" aria-hidden="true">
<div class="modal-dialog">
<div class="modal-content">
<div class="modal-header">
<h1 class="modal-title fs-5" id="staticBackdropLabel">최애 음악</h1>
<button type="button" class="btn-close" data-bs-dismiss="modal" aria-label="Close"></button>
</div>
<div class="modal-body">
<form>
<div class="mb-3">
<label for="exampleInputEmail1" class="form-label">유저</label>
<input type="text" class="form-control" id="exampleInputEmail1"
aria-describedby="emailHelp">
<div id="emailHelp" class="form-text">등록하시는 사용자 이름을 넣어주세요.</div>
</div>
<div class="mb-3">
<label for="exampleInputPassword1" class="form-label">노래제목</label>
<input type="text" class="form-control" id="exampleInputPassword1">
<div id="emailHelp" class="form-text">좋아하는 노래 제목을 넣어주세요.</div>
</div>
<div class="mb-3">
<label for="exampleInputPassword1" class="form-label">가수</label>
<input type="text" class="form-control" id="exampleInputPassword1">
</div>
<div class="mb-3">
<label for="exampleInputPassword1" class="form-label">앨범 커버URL</label>
<input type="text" class="form-control" id="exampleInputPassword1">
</div>
<button type="submit" class="btn btn-primary">Submit</button>
</form>
</div>
</div>
</div>
</div>
<!-- footer -->
<div class="d-flex flex-column flex-sm-row justify-content-between py-4 my-4 border-top">
<p>©땡땡영상제작소.</p>
<ul class="list-unstyled d-flex">
<li class="ms-3"><a class="link-body-emphasis" href="#"><i class="bi bi-1-circle-fill"></i></a></li>
<li class="ms-3"><a class="link-body-emphasis" href="#"><i class="bi bi-2-circle-fill"></i></a></li>
<li class="ms-3"><a class="link-body-emphasis" href="#"><i class="bi bi-3-circle-fill"></i></a></li>
</ul>
</div>
</div>
<script src="https://cdn.jsdelivr.net/npm/bootstrap@5.3.0/dist/js/bootstrap.bundle.min.js"
integrity="sha384-geWF76RCwLtnZ8qwWowPQNguL3RmwHVBC9FhGdlKrxdiJJigb/j/68SIy3Te4Bkz"
crossorigin="anonymous"></script>
</body>
</html>
그때 발생한 에러. 이건 또 무엇이다냐.

해결방법
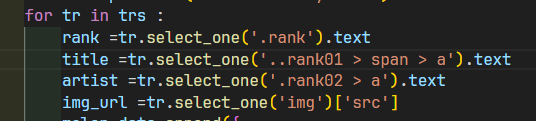
얼탱없다. title 부분 select_one에서 클래스.를 두개 찍었다고 저런 오류가떴다. 별게 다 뜨는구나.